How to make a Callout in Rich Text
Important:You've seen this Callout component everywhere in Webflow's tutorial documents, but they never shared how to make one. You've tried a lot ways to make it, but it seems never work. Now the worry is to the end, let me show you how they make it and you can make it, too.
This project aims to demonstrate how to create callout elements in Rich Text. This Callout is commonly seen in Webflow's documentation. It is not a native Webflow element but a script-generated component. The method involves combination of block quote and H6 elements to construct the content. Once the code detects this format, it creates the prepared component. The types of callouts are prewritten in the code and are limited in choice. Here are the step-by-step instructions:
- Create a Rich Text Element
- Construct the Callout
- Style the Rich Text
- Add Javascript Code
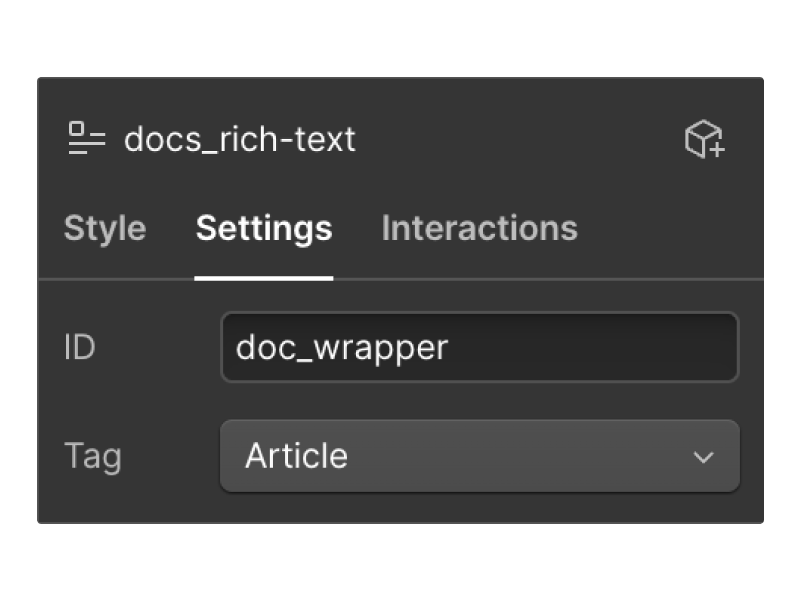
Create a Rich Text Element
Create Rich Text and give it an ID of "doc_wrapper", this is mandatory, the ID is declared in the script.
Construct the Callout
Use a combination of H6 and Block Quote for your Callout title and content. By default, the callout will display as a Note. To specify other options, start your content with "Pro tip", "Important", "Good to know", "Learn more", or "Warning" in Bold followed by a colon ( : ). Then, write your content without breaking the line. Each callout has a corresponding icon that is hardcoded. You cannot change the icon unless you modify the script.

Style the Rich Text
Before finishing the editing, include the style for each element. The original code was designed for both callout and anchor link functionalities. For simplicity, I hided the anchor part. Copy and paste the style code into the <head>tag.
<style>
/* - - - CALLOUTS - - - */
.docs_callout+.docs_callout {margin-top: -1.5rem;} /* Reduce margin with two callout meet */
.docs_callout h6 {margin: 0;} /* Clean up h6 margin */
.w-richtext .anchor {display: none;} /* Hide unnessary elements  */
.w-richtext .tooltip {display: none;} /* Hide unnessary elements  */

/* Reset figure width limit in Rich Text  */
.w-richtext figure {
  max-width: none!important;
  position: relative;
}
</style>
Add Javascript Code
The final step is to add the functionality code. This is a remote Javascript file hosted on Github. Simply include it in the Before </body> tag. You can see the code is from the legendary Mackenzie Child
<!--Doc Callouts-->
<script src="https://cdn.jsdelivr.net/gh/mackenziechild/wfu3/js/docs-callouts.min.js
"></script>